


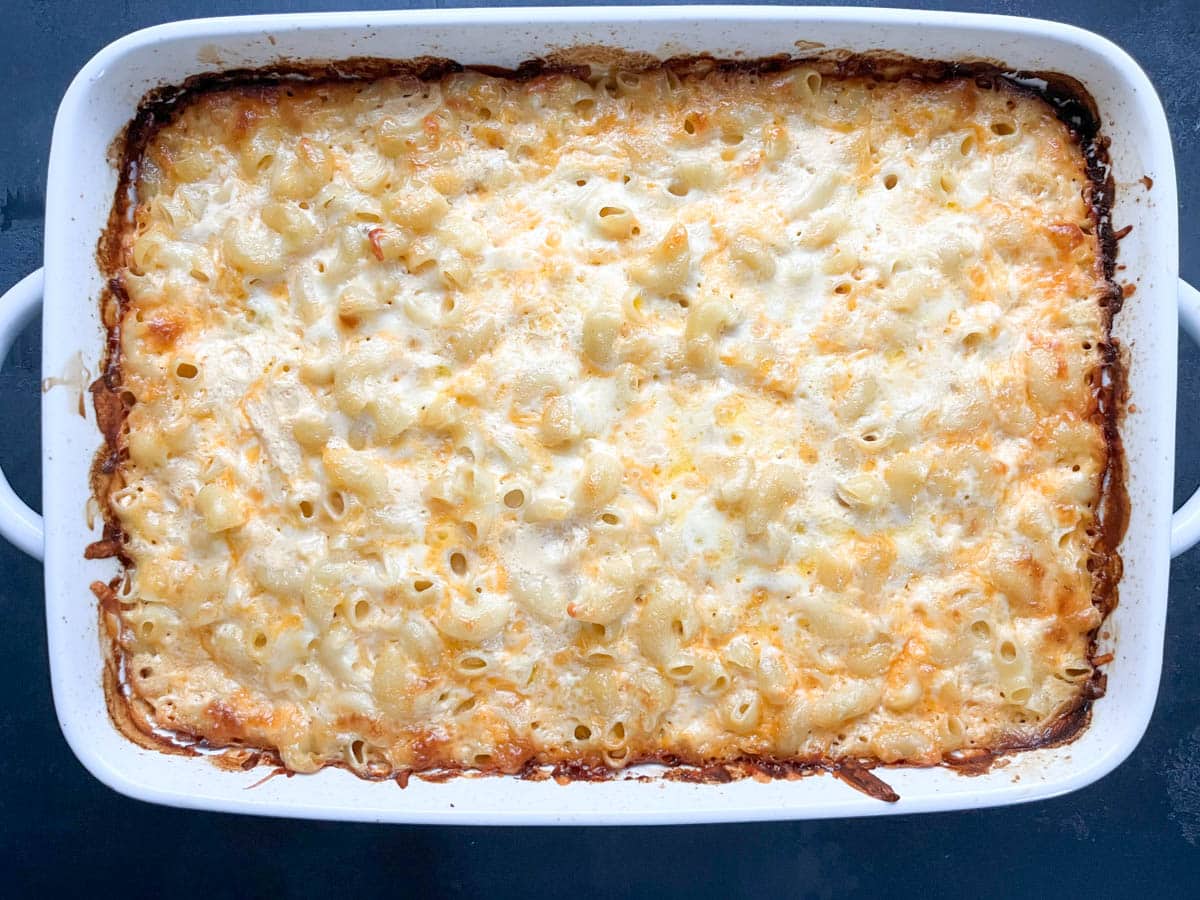
If there's one dish that always brings people back for seconds (and thirds), it's baked mac and cheese. This is one Soul Food dish we always have on our dinner table at every holiday, family gathering, or Sunday dinner. If I had to describe it in a few words, I'd say... creamy, cheesy, goodness. Serve it up with crispy Cajun fried chicken or, blackened chicken tenders, with a scoop of tender collard greens, and a slice of golden cast iron cornbread.
I learned how to make mine by watching my aunt, who had that magical way of cooking without measuring a single thing. From the first time I made it on my own, it came out just like hers-rich, creamy, and full of flavor. No Velveeta cheese, no cream cheese, no canned cheese, no butter, no greasy puddles, no shortcuts. Just the real-deal mac and cheese made with freshly shredded cheese for that perfect pull-apart texture and cheesy flavor.
It's satisfying but not overly heavy. You'll enjoy every bite without feeling stuffed. And, thanks to a simple egg and carnation milk mixture, it stays moist even after baking.

Jump to:
Ingredient Notes
This dish is simple, but each ingredient plays a big role in getting that signature Soul Food flavor and texture just right. The 3-cheese blend gives it a melty base and freshly shredded cheese is key for the best melt.
Evaporated milk and a whisked egg work together to bind the mac and cheese while keeping it creamy and not heavy. And don't skip seasoning your pasta and milk mixture-this simple step takes it from good to unforgettable.
Cree's Tips
- Boil the pasta just until al dente and rinse it under cold water to stop the cooking process, then drain it well using a colander.
- Using room-temperature evaporated milk helps the cheese melt more smoothly and evenly.
- Instead of stirring all the cheese into the pasta, layer it between and on top before baking. This gives you melty pockets throughout and that perfectly golden crust on top.
- Use a mix of your favorite melty cheeses (mild, medium, sharp, or even smoked Gouda).
- Cover with foil while baking until the cheese is fully melted and bubbling, then remove the foil and continue baking for 5 minutes to create that signature golden top and slightly crisp edges everyone loves.
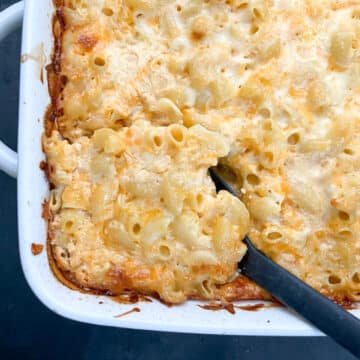
- Let the dish rest in the pan for 5 to 10 minutes before serving. It's the hardest part, but worth it- the layers settle, and it slices beautifully.
- You can prepare the mac and cheese the day before, but don't add the egg-milk mixture until you're ready to bake.
How to Make Baked Soul Food Mac and Cheese
Making this mac and cheese from scratch might sound like a labor of love and it is, but it's also surprisingly simple when you break it down. With a few tried-and-true techniques and the right mix of melty cheeses, you'll have a creamy, flavorful dish.
Planning ahead? You can prep this dish the night before and bake it fresh the next day. It also doubles beautifully if you're feeding a crowd- just use a larger pan and keep an eye on the bake time.

- Boil your pasta just until al dente
- Layer the cooked pasta with freshly shredded cheese.
- Whisk together the egg and evaporated milk, then season it well this is where the flavor really comes in.
- Pour the egg-milk mixture evenly over the entire dish, making sure it seeps down into all the layers.
- Bake covered first, then uncovered this helps the cheese melt fully before forming that golden, bubbly crust.
- Let it rest.

Storage and Reheat
To store, wrap the baking dish tightly with plastic wrap, or cut the mac and cheese into squares and store in a medium to large ziploc bag. Keep it in the fridge for up to 4 days to maintain freshness.
To reheat, cover loosely with foil and place in a preheated 375°F oven. Warm until the cheese is bubbling and hot throughout.
📖 Recipe
Baked Soul Food Mac and Cheese (3 Cheeses)
Baked Soul Food Mac and Cheese (3 Cheeses)Equipment
- Soup pot for boiling pasta
- Baking dish
- Box grater
- measuring cup
- Measuring spoon
Ingredients
- 2 small bags large elbow noodles (or 1 large bag)
- 16 oz colby jack cheese (shredded by hand using a box grater)
- 16 oz mozzarella cheese (shredded by hand using a box grater)
- 8 oz medium cheddar cheese (or mild - shredded by hand using a box grater)
- 24 oz evaporated carnation milk (or 2-12 oz cans - whole carnation milk)
- 1 egg
- ½ tablespoon kosher salt
Instructions
- Preheat your oven to 400°F. Grease a 9x13-inch baking dish with butter and set it aside.
- Bring a large pot of salted water to a boil. Add the elbow macaroni and cook until al dente, follow the instructions on the packaging (don't overcook since it will continue cooking in the oven). Drain the pasta in a colander and rinse it under cold water to stop the cooking process. Let it drain completely.
- Using a box grater, grate all the cheeses: medium cheddar cheese, Colby cheese, mozzarella cheese, and gouda cheese (if using). Combine the different cheeses in a large mixing bowl. Set aside.
- In a measuring cup, whisk together the evaporated milk, egg, and kosher salt (and, pepper, garlic powder, onion powder-if using).
- Layer the cooked pasta in the prepared baking dish. Sprinkle a third of the grated cheese mixture over the pasta. Repeat two more layers, adding cheese in between each layer.
- Pour the egg-milk mixture evenly over the layered pasta and cheese, making sure it covers the entire surface.
- Cover the baking dish loosely with aluminum foil and bake for 40 minutes in a preheated 400-degree oven or until the cheese is melted and the mixture is bubbling. Remove the aluminum foil and continue baking for approximately 5-10 minutes or until the top is golden and the edges are a little crispy. TIP: Lightly spritz the sheet of foil with cooking spray to prevent it from sticking to the melted cheese while baking.
Notes
-
- Boil the pasta just until al dente and rinse it under cold water to stop the cooking process, then drain it well using a colander.
- Using room-temperature evaporated milk helps the cheese melt more smoothly and evenly.
- Instead of stirring all the cheese into the pasta, layer it between and on top before baking. This gives you melty pockets throughout and that perfectly golden crust on top.
- Use a mix of your favorite melty cheeses (mild, medium, sharp, or even smoked Gouda) for extra depth.
- Cover with foil while baking until the cheese is fully melted and bubbling, then remove the foil to finish baking uncovered. This creates that signature golden top and slightly crisp edges everyone loves.
- Let the dish rest in the pan for about 10 minutes before serving. It's the hardest part, but worth it- the layers settle, and it slices beautifully.
- You can prepare the mac and cheese the day before but don't add the egg-milk mixture until you're ready to bake.
Nutrition
Nutrition Disclaimer
Nutritional information is an estimate provided by an online nutrition calculator. For the most accurate results, we recommend calculating the nutritional information using the specific ingredients and brands you use.


Michiel's Kitchen says
Little beats a deliciously creamy and classic mac and cheese!
Thank you for sharing your recipe!
CookingwithBliss says
Hi Michiel - You're so right. Since it's grilling season, I will be serving this as a side dish alongside ribs and chicken. Thanks for visiting, and my apology for the late response.