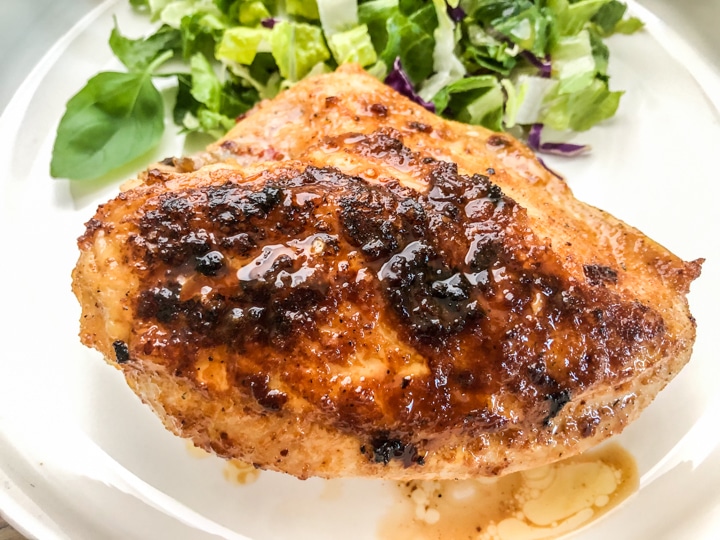
Cooking chicken breast in a cast iron skillet delivers perfectly seared chicken with a golden-brown crust and tender, juicy interior. If you're looking for a quick weeknight dinner, I'll walk you through the steps to achieve restaurant-quality chicken breast in your own kitchen, along with tips and a few variations, to keep you inspired to cook.
Jump to:
Why Cook Chicken Breast in a Cast Iron Skillet
Cooking chicken breast in a cast iron skillet is one of the best methods for achieving a beautifully seared crust. The skillet’s ability to retain and distribute heat evenly ensures that your chicken cooks perfectly every time.
Plus, using a cast iron skillet is versatile which allows you to go from the stove-top to oven so easily.
Ingredients
To make this recipe you don't need a long list of ingredients. In fact, you may already have many of these pantry staples. Here's what you'll need:
- Bone-in chicken breast
- Cooking oil (grapeseed oil, avocado oil, or extra virgin olive oil)
- Garlic powder
- Onion powder
- Smoked paprika
- Red pepper flakes
- Black pepper
- Dried Thyme
Ingredient Note
Chicken breast, unlike other cuts of chicken, can easily become dry and tough if overcooked. To avoid this, here are two important tips:
- Brining your chicken breast in a simple saltwater solution before cooking will help it retain moisture and tenderness.
- If you don’t already have one, consider investing in an instant read meat thermometer. This tool is essential for accurately checking the internal temperature of your chicken (more on this below).
Refer to recipe card for details.
How to Cook Chicken Breast in a Cast Iron Skillet
Now that you have everything you need, it's time to start cooking. Follow these step-by-step instructions to create perfectly seared chicken breast in your cast iron skillet. These clear and simple steps will guide you through the process from brining to pan-searing.
Brining process
Brine chicken in a salt water mixture for 15 minutes up to 6 hours then rinse and pat dry thoroughly with paper towels.
Preheat skillet
Place your cast iron skillet on the stove-top over medium-high heat and let it preheat for about 5 minutes. You want the skillet to be hot enough to sear the chicken and create a golden crust.
Prepare chicken
While the skillet is heating, season the skin generously with Cajun seasoning and kosher salt.
Add the oil
Add the grapeseed oil and butter. When the oil begins to shimmer allow it to coat the bottom of the skillet evenly.
Sear the chicken
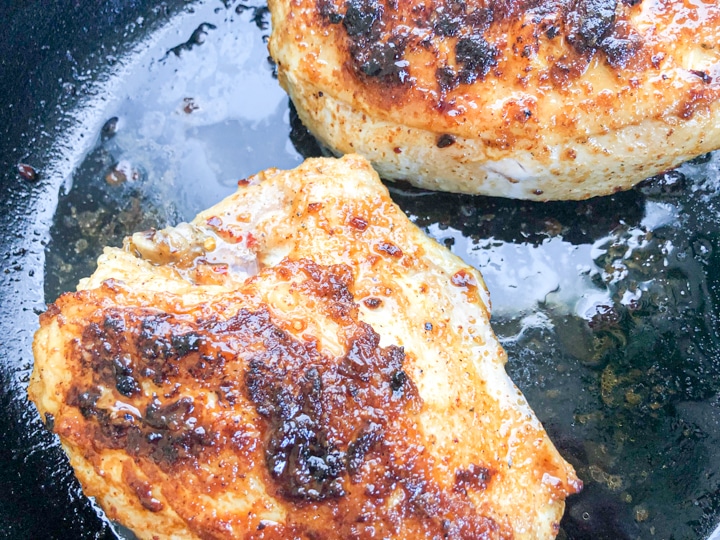
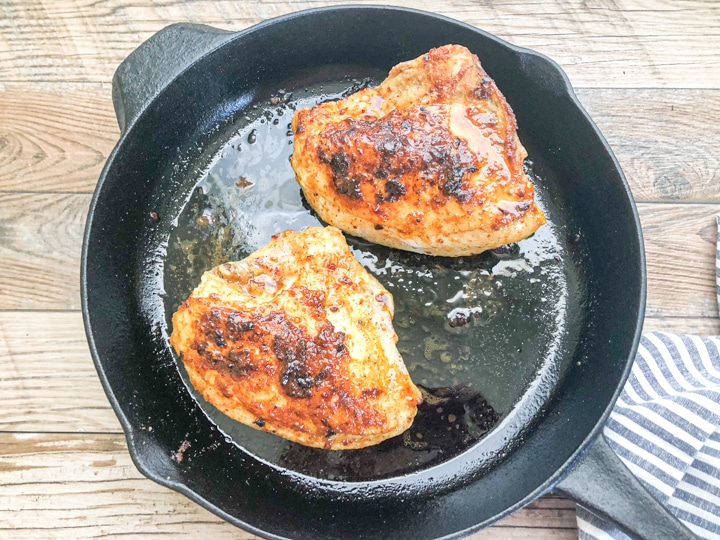
Place the chicken breast in the skillet with the skin-side down and sear until the skin turns a golden brown color. Resist the urge to move or lift the chicken as this can prevent the skin from browning.
Flip and finish
Flip the chicken breast over and place in a preheated 425 degree oven to roast. Your chicken is done when the internal temperature reaches 165 degrees F.
To check, insert an instant read meat thermometer into the thickest part of the breast, when it registers at 165 degrees, it's done.
Rest and serve
Transfer the chicken to a plate or serving dish and spoon the pan juices over each breast several times, and let it rest for 5 minutes before slicing. This helps the juices redistribute, keeping the chicken moist and flavorful.
Top Tips
To get the best results when cooking chicken breast in a cast iron skillet, keep these tips in mind:
- Always make sure your chicken breast is at room temperature before cooking, so it cooks evenly.
- You will get the best sear when your chicken is completely dry. Pat drying with paper towels is important to absorb any excess moisture.
- Always season your cast iron skillet properly to prevent any food from sticking and the same applies for this recipe.
- When searing, be patient and do not flip your chicken over too early as this could potentially cause your chicken to stick.
- Season generously with your Cajun seasoning and kosher salt unless you're following a low-sodium diet.
- If you're not used to cooking chicken breast, or you've tried in the past, but it came out dry and bland remember to brine and use an instant read meat thermometer to check that the internal temperature reaches 165 degrees and not higher.
Flavor Variations
There are plenty of ways to bring new flavors to your chicken breast - adding a twist can elevate your dish.
For a little extra inspiration, try using the marinade from our whole marinated chicken wings—it works beautifully with this recipe too! For more inspiration try:
Garlic Herb Chicken: Add fresh garlic cloves and herbs like thyme or rosemary to the skillet during the last few minutes of cooking. This infuses the chicken with aromatic flavors. Then, spoon over the top of each breast.
Lemon Pepper Chicken: Squeeze fresh lemon juice over the chicken before serving and sprinkle with cracked black pepper for a bright, zesty flavor.
Common Mistakes to Avoid When Cooking Chicken Breast
Avoid these common mistakes to make sure your chicken breasts come out perfect every time.
- Always preheat your skillet to ensure a good sear and even cooking
- Remember chicken breast is lean and can dry out completely. Keep a close eye on it and use a meat thermometer to prevent overcooking. It's done when it reaches an internal temperature of 165 degrees.
- Cutting into the chicken too soon after cooking can cause the juices to run out. It's important to allow the breasts to rest before slicing into it.
Serving Suggestions
Whether you're keeping things simple with a fresh spring salad, Easy Peach Arugula Salad, or Chicken Strawberry Walnut Salad or pairing it with Crispy Oven Roasted Baby Potatoes, these side dishes will help you create a balanced and satisfying dish.
Store and Reheat
Store
Place any leftovers in an airtight container and refrigerate for up to 3 days.
Reheat
To reheat, wrap the chicken breast loosely in foil and place in a preheated oven at 350°F until warmed through. Avoid using the microwave, as it can make the chicken rubbery.
FAQs
Do not depend on cooking time instead focus on the internal temperature of the chicken breast to prevent it from being overcooked and tasting dry.
Invest in a good instant read meat thermometer to check the internal temperature by inserting it into the thickest part of the chicken breast without touching the bone if you're working with bone-in chicken breast.
The ultimate key is to brine your chicken breast for at least 15 minutes or up to 6 hours in the fridge. I wouldn't recommend brining longer than 6 hours it really isn't necessary. Brining any protein allows for moist and juicer meat.
There are certain foods that you shouldn't cook in a cast iron skillet such as:
Acidic foods such as tomato based food or lemons can break down the seasoned surface.
Eggs will basically stick to the skillet if your skillet isn't seasoned properly.
Sticky foods makes it more challenging to clean the skillet, but it's doable.
Fish, especially delicate fish, will stick and also cause the skillet to smell fishy even after cleaning, so you may want to use a different kind of skillet.
You sear chicken for at least 6 to 8 minutes until a nice golden brown crusty outer coating develops before flipping it over.
Other Chicken Recipe You'll Love
Be sure to check out some of our other chicken recipes.
- Ultimate Crispy Cast Iron Skillet Chicken Thighs
- Easy Salt and Pepper Chicken Wings Recipe
- Crispy Oven Baked Chicken Wings (Baking Powder)
- Easy Stove Top Chicken Thighs
📖 Recipe
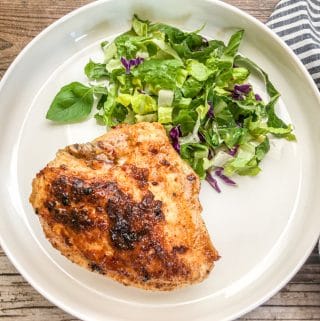
Cast Iron Skillet Chicken Breast
Cast Iron Skillet Chicken BreastEquipment
- Cast Iron Skillet
Ingredients
Simple Brine
- 12 cups warm water
- ¼ cup kosher salt
Seasoning
- 2 chicken breast bone-in (cook the appropriate amount of chicken breast based on the number of people you are serving)
- ½ tablespoon kosher salt
- 1 teaspoon garlic powder
- 1 teaspoon onion powder
- 1 teaspoon smoked paprika
- ½ teaspoon red pepper flakes
- ½ teaspoon black pepper
- ⅛ teaspoon dried thyme
- 2 tablespoon grapeseed oil (or other cooking oil with high smoke point)
- 2 tablespoon butter (or ghee if on Whole30)
Instructions
- Preheat oven to 425 degrees.
- Wash chicken (optional). I do but there is debate over whether or not chicken should be washed.
- In a pot or large bowl add 12 cups of warm water. Add salt and stir until salt dissolves. Add chicken breast. Allow chicken to brine for at least 15 minutes or up to 6 hours.
- Remove chicken breast from brine and rinse with water. Pat dry with paper towels.
- Season side with skin using kosher salt, garlic powder, onion powder, pepper, smoked paprika, red pepper flakes, dried thyme. This is Cajun seasoning. Feel free to purchase store bought Cajun seasoning if you would like.
- Place cast iron skillet over medium-high heat. Add grapeseed oil (or other cooking oil with high smoke point) and butter (or ghee). When skillet is hot, add chicken breast to cast iron skillet with skin-side down and sear for 3 to 4 minutes. Flip chicken breast over (skin-side up) and place cast iron skillet in oven to roast. Roast until internal temperature reaches 165 degrees. Use a meat thermometer to check internal temperature of each breast.
- Remove skillet from oven and spoon pan juices over each chicken breast several times. Place chicken breast on a serving dish and allow them to rest (about 5 to 7 minutes) to redistribute the juices.
Notes
-
Always make sure your chicken breast is at room temperature before cooking, so it cooks evenly.
-
You will get the best sear when your chicken is completely dry. Pat drying with paper towels is important to absorb any excess moisture.
-
Always season your cast iron skillet properly to prevent any food from sticking and the same applies for this recipe.
-
When searing, be patient and do not flip your chicken over too early as this could potentially cause your chicken to stick.
-
Season generously with your Cajun seasoning and kosher salt unless you're following a low-sodium diet.
-
If you're not used to cooking chicken breast, or you've tried in the past, but it came out dry and bland remember to brine and use an instant read meat thermometer to check that the internal temperature reaches 165 degrees and not higher.
Nutrition
Nutrition Disclaimer
Nutritional information is an estimate provided by an online nutrition calculator. For the most accurate results, we recommend calculating the nutritional information using the specific ingredients and brands you use.


Yvonne Alexander says
So moist. Never thought to brine my chicken that id be cooking on skillet or grill. So smart!